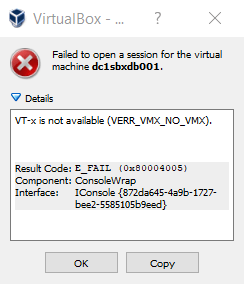
If you want to use Oracle’s VirtualBox on Windows 10, you first need to disable Microsoft’s Hyper-V. I’ve used VirtualBox many times in the past but on the likes of Windows 7, where Hyper-V isn’t installed by default as part of the O/S. It seems on Windows 10 Enterprise, Hyper-V is installed by default and is started as part of the bootup.
Hyper-V blocks all other Hyper Visors like VirtualBox from calling VT hardware, therefore it’s required for it to be disabled.
To check
Run ‘bcdedit’ in Command Prompt as Admin:
C:\Users\anwarz>bcdedit

Windows Boot Manager
--------------------
identifier {bootmgr}
device partition=\Device\HarddiskVolume2
path \EFI\Microsoft\Boot\bootmgfw.efi
description Windows Boot Manager
locale en-GB
inherit {globalsettings}
badmemoryaccess Yes
isolatedcontext Yes
default {current}
resumeobject {a14884a8-6117-11e7-a334-f430b9153789}
displayorder {current}
toolsdisplayorder {memdiag}
timeout 30

Windows Boot Loader
-------------------
identifier {current}
device partition=C:
path \WINDOWS\system32\winload.efi
description Windows 10
locale en-GB
inherit {bootloadersettings}
recoverysequence {a14884aa-6117-11e7-a334-f430b9153789}
displaymessageoverride Recovery
recoveryenabled Yes
badmemoryaccess Yes
isolatedcontext Yes
allowedinmemorysettings 0x15000075
osdevice partition=C:
systemroot \WINDOWS
resumeobject {a14884a8-6117-11e7-a334-f430b9153789}
nx OptIn
bootmenupolicy Standard
hypervisorlaunchtype Auto

C:\Users\anwarz>
You’ll see it say ‘Auto‘ for hypervisorlaunchtype, this means it was enabled to load at boot. So if this option wasn’t changed since last boot, then Hyper-V is enabled.
To Disable
Run the following command in Command Prompt as Admin:
C:\Users\anwarz>bcdedit /set hypervisorlaunchtype off
The operation completed successfully.

C:\Users\anwarz>bcdedit

Windows Boot Manager
--------------------
identifier {bootmgr}
device partition=\Device\HarddiskVolume2
path \EFI\Microsoft\Boot\bootmgfw.efi
description Windows Boot Manager
locale en-GB
inherit {globalsettings}
badmemoryaccess Yes
isolatedcontext Yes
default {current}
resumeobject {a14884a8-6117-11e7-a334-f430b9153789}
displayorder {current}
toolsdisplayorder {memdiag}
timeout 30

Windows Boot Loader
-------------------
identifier {current}
device partition=C:
path \WINDOWS\system32\winload.efi
description Windows 10
locale en-GB
inherit {bootloadersettings}
recoverysequence {a14884aa-6117-11e7-a334-f430b9153789}
displaymessageoverride Recovery
recoveryenabled Yes
badmemoryaccess Yes
isolatedcontext Yes
allowedinmemorysettings 0x15000075
osdevice partition=C:
systemroot \WINDOWS
resumeobject {a14884a8-6117-11e7-a334-f430b9153789}
nx OptIn
bootmenupolicy Standard
hypervisorlaunchtype Off

C:\Users\anwarz>
You’ll see it say ‘Off‘ for hypervisorlaunchtype, this means it is now disabled to load at boot. However, the current boot had this enabled and therefore requires you to reboot to not have Hyper-V loaded.
To Enable
Run the following command in Command Prompt as Admin:
C:\Users\anwarz>bcdedit /set hypervisorlaunchtype auto
The operation completed successfully.

C:\Users\anwarz>bcdedit

Windows Boot Manager
--------------------
identifier {bootmgr}
device partition=\Device\HarddiskVolume2
path \EFI\Microsoft\Boot\bootmgfw.efi
description Windows Boot Manager
locale en-GB
inherit {globalsettings}
badmemoryaccess Yes
isolatedcontext Yes
default {current}
resumeobject {a14884a8-6117-11e7-a334-f430b9153789}
displayorder {current}
toolsdisplayorder {memdiag}
timeout 30

Windows Boot Loader
-------------------
identifier {current}
device partition=C:
path \WINDOWS\system32\winload.efi
description Windows 10
locale en-GB
inherit {bootloadersettings}
recoverysequence {a14884aa-6117-11e7-a334-f430b9153789}
displaymessageoverride Recovery
recoveryenabled Yes
badmemoryaccess Yes
isolatedcontext Yes
allowedinmemorysettings 0x15000075
osdevice partition=C:
systemroot \WINDOWS
resumeobject {a14884a8-6117-11e7-a334-f430b9153789}
nx OptIn
bootmenupolicy Standard
hypervisorlaunchtype Auto

C:\Users\anwarz>
You’ll see it say ‘Auto‘ for hypervisorlaunchtype, this means it is now enabled to load at boot. However, the current boot had this disabled and therefore requires you to reboot to have Hyper-V loaded.
Just a note, I’ve not got anything against Hyper-V, we use it quite frequently, it’s stable, however in this instance, I want to use VirtualBox which I am more accustomed for certain features 🙂
Related Blog Posts
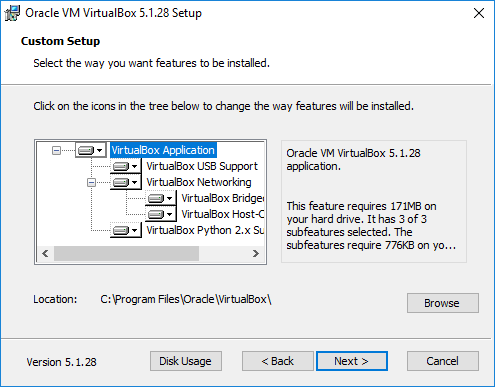
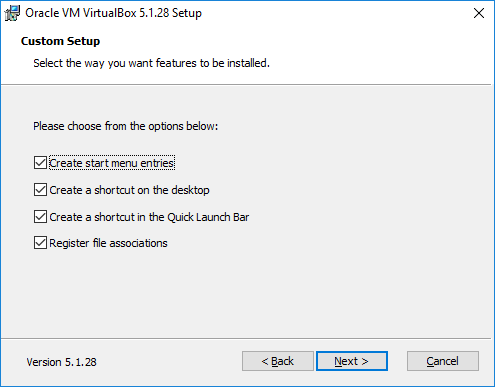
Install Oracle’s VirtualBox
If you found this blog post useful, please like as well as follow me through my various Social Media avenues available on the sidebar and/or subscribe to this oracle blog via WordPress/e-mail.
Thanks
Zed DBA (Zahid Anwar)