Please check the following blog post “How to check if Exadata Write-Back Flash Cache is Enabled” for:
- What is Exadata Write-Back Flash Cache?
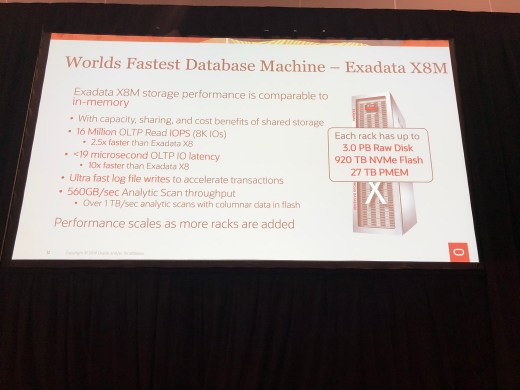
- What are the Performance Benefits of Exadata Write-Back Flash Cache?
- How to check if Exadata Write-Back Flash Cache is Enabled?
- Pre-requisites and minimum versions.
You can also get more info from My Oracle Support (MOS) note:
Exadata Write-Back Flash Cache – FAQ (Doc ID 1500257.1)
OTN Article: Oracle Exadata Database Machine – Write-Back Flash Cache
How to Enable Exadata Write-Back Flash Cache
PLEASE NOTE: Although I have illustrated the steps below, please cross check with the MOS note to ensure the method below matches your setup or the steps haven’t changed with future releases (after the time of writing).
With Exadata software 11.2.3.3.1 or higher, it is not required to stop the cellsrv process on the storage cells or to inactivate griddisk. If you are 11.2.3.2.1 to 11.2.3.3.0, the refer to the MOS notes for additional steps.
It is recommend to enabled Write-Back Flash Cache during a period of reduced workload to reduce the performance impact on the database.
Before proceeding with the enabling of Write-Back Flash Cache, it is recommended to check the caching policy of the grid disks, as we don’t want to enable Write-Back Flash Cache for grid disks that don’t need it i.e. RECO and DBFS disk groups:
[root@v1oex2dbadm01 ~]# dcli -l root -g /opt/oracle.SupportTools/onecommand/cell_group cellcli -e list griddisk attributes name,cachingpolicy,cachedby
 v1oex2celadm01: DATAC1_CD_00_v1oex2celadm01 default
 v1oex2celadm01: DATAC1_CD_01_v1oex2celadm01 default
 v1oex2celadm01: DATAC1_CD_02_v1oex2celadm01 default
 v1oex2celadm01: DATAC1_CD_03_v1oex2celadm01 default
 v1oex2celadm01: DATAC1_CD_04_v1oex2celadm01 default
 v1oex2celadm01: DATAC1_CD_05_v1oex2celadm01 default
 v1oex2celadm01: DBFS_DG_CD_02_v1oex2celadm01 default
 v1oex2celadm01: DBFS_DG_CD_03_v1oex2celadm01 default
 v1oex2celadm01: DBFS_DG_CD_04_v1oex2celadm01 default
 v1oex2celadm01: DBFS_DG_CD_05_v1oex2celadm01 default
 v1oex2celadm01: RECOC1_CD_00_v1oex2celadm01 default
 v1oex2celadm01: RECOC1_CD_01_v1oex2celadm01 default
 v1oex2celadm01: RECOC1_CD_02_v1oex2celadm01 default
 v1oex2celadm01: RECOC1_CD_03_v1oex2celadm01 default
 v1oex2celadm01: RECOC1_CD_04_v1oex2celadm01 default
 v1oex2celadm01: RECOC1_CD_05_v1oex2celadm01 default
 v1oex2celadm02: DATAC1_CD_00_v1oex2celadm02 default
 v1oex2celadm02: DATAC1_CD_01_v1oex2celadm02 default
 v1oex2celadm02: DATAC1_CD_02_v1oex2celadm02 default
 v1oex2celadm02: DATAC1_CD_03_v1oex2celadm02 default
 v1oex2celadm02: DATAC1_CD_04_v1oex2celadm02 default
 v1oex2celadm02: DATAC1_CD_05_v1oex2celadm02 default
 v1oex2celadm02: DBFS_DG_CD_02_v1oex2celadm02 default
 v1oex2celadm02: DBFS_DG_CD_03_v1oex2celadm02 default
 v1oex2celadm02: DBFS_DG_CD_04_v1oex2celadm02 default
 v1oex2celadm02: DBFS_DG_CD_05_v1oex2celadm02 default
 v1oex2celadm02: RECOC1_CD_00_v1oex2celadm02 default
 v1oex2celadm02: RECOC1_CD_01_v1oex2celadm02 default
 v1oex2celadm02: RECOC1_CD_02_v1oex2celadm02 default
 v1oex2celadm02: RECOC1_CD_03_v1oex2celadm02 default
 v1oex2celadm02: RECOC1_CD_04_v1oex2celadm02 default
 v1oex2celadm02: RECOC1_CD_05_v1oex2celadm02 default
 v1oex2celadm03: DATAC1_CD_00_v1oex2celadm03 default
 v1oex2celadm03: DATAC1_CD_01_v1oex2celadm03 default
 v1oex2celadm03: DATAC1_CD_02_v1oex2celadm03 default
 v1oex2celadm03: DATAC1_CD_03_v1oex2celadm03 default
 v1oex2celadm03: DATAC1_CD_04_v1oex2celadm03 default
 v1oex2celadm03: DATAC1_CD_05_v1oex2celadm03 default
 v1oex2celadm03: DBFS_DG_CD_02_v1oex2celadm03 default
 v1oex2celadm03: DBFS_DG_CD_03_v1oex2celadm03 default
 v1oex2celadm03: DBFS_DG_CD_04_v1oex2celadm03 default
 v1oex2celadm03: DBFS_DG_CD_05_v1oex2celadm03 default
 v1oex2celadm03: RECOC1_CD_00_v1oex2celadm03 default
 v1oex2celadm03: RECOC1_CD_01_v1oex2celadm03 default
 v1oex2celadm03: RECOC1_CD_02_v1oex2celadm03 default
 v1oex2celadm03: RECOC1_CD_03_v1oex2celadm03 default
 v1oex2celadm03: RECOC1_CD_04_v1oex2celadm03 default
 v1oex2celadm03: RECOC1_CD_05_v1oex2celadm03 default
 [root@v1oex2dbadm01 ~]#
As you can see, all the grid disks have default caching policy. As per the following MOS note, we disable caching for RECO and DBFS disk groups:
Oracle Exadata Database Machine Setup/Configuration Best Practices (Doc ID 1274318.1)
[root@v1oex2dbadm01 ~]# dcli -c v1oex2celadm01 -l root cellcli -e alter griddisk DBFS_DG_CD_02_v1oex2celadm01,DBFS_DG_CD_03_v1oex2celadm01,DBFS_DG_CD_04_v1oex2celadm01,DBFS_DG_CD_05_v1oex2celadm01 cachingPolicy="none"
 v1oex2celadm01: GridDisk DBFS_DG_CD_02_v1oex2celadm01 successfully altered
 v1oex2celadm01: GridDisk DBFS_DG_CD_03_v1oex2celadm01 successfully altered
 v1oex2celadm01: GridDisk DBFS_DG_CD_04_v1oex2celadm01 successfully altered
 v1oex2celadm01: GridDisk DBFS_DG_CD_05_v1oex2celadm01 successfully altered
[root@v1oex2dbadm01 ~]# dcli -c v1oex2celadm02 -l root cellcli -e alter griddisk DBFS_DG_CD_02_v1oex2celadm02,DBFS_DG_CD_03_v1oex2celadm02,DBFS_DG_CD_04_v1oex2celadm02,DBFS_DG_CD_05_v1oex2celadm02 cachingPolicy="none"
 v1oex2celadm02: GridDisk DBFS_DG_CD_02_v1oex2celadm02 successfully altered
 v1oex2celadm02: GridDisk DBFS_DG_CD_03_v1oex2celadm02 successfully altered
 v1oex2celadm02: GridDisk DBFS_DG_CD_04_v1oex2celadm02 successfully altered
 v1oex2celadm02: GridDisk DBFS_DG_CD_05_v1oex2celadm02 successfully altered
[root@v1oex2dbadm01 ~]# dcli -c v1oex2celadm03 -l root cellcli -e alter griddisk DBFS_DG_CD_02_v1oex2celadm03,DBFS_DG_CD_03_v1oex2celadm03,DBFS_DG_CD_04_v1oex2celadm03,DBFS_DG_CD_05_v1oex2celadm03 cachingPolicy="none"
 v1oex2celadm03: GridDisk DBFS_DG_CD_02_v1oex2celadm03 successfully altered
 v1oex2celadm03: GridDisk DBFS_DG_CD_03_v1oex2celadm03 successfully altered
 v1oex2celadm03: GridDisk DBFS_DG_CD_04_v1oex2celadm03 successfully altered
 v1oex2celadm03: GridDisk DBFS_DG_CD_05_v1oex2celadm03 successfully altered
[root@v1oex2dbadm01 ~]# dcli -c v1oex2celadm01 -l root cellcli -e alter griddisk RECOC1_CD_00_v1oex2celadm01,RECOC1_CD_01_v1oex2celadm01,RECOC1_CD_02_v1oex2celadm01,RECOC1_CD_03_v1oex2celadm01,RECOC1_CD_04_v1oex2celadm01,RECOC1_CD_05_v1oex2celadm01 cachingPolicy="none"
 v1oex2celadm01: GridDisk RECOC1_CD_00_v1oex2celadm01 successfully altered
 v1oex2celadm01: GridDisk RECOC1_CD_01_v1oex2celadm01 successfully altered
 v1oex2celadm01: GridDisk RECOC1_CD_02_v1oex2celadm01 successfully altered
 v1oex2celadm01: GridDisk RECOC1_CD_03_v1oex2celadm01 successfully altered
 v1oex2celadm01: GridDisk RECOC1_CD_04_v1oex2celadm01 successfully altered
 v1oex2celadm01: GridDisk RECOC1_CD_05_v1oex2celadm01 successfully altered
[root@v1oex2dbadm01 ~]# dcli -c v1oex2celadm02 -l root cellcli -e alter griddisk RECOC1_CD_00_v1oex2celadm02,RECOC1_CD_01_v1oex2celadm02,RECOC1_CD_02_v1oex2celadm02,RECOC1_CD_03_v1oex2celadm02,RECOC1_CD_04_v1oex2celadm02,RECOC1_CD_05_v1oex2celadm02 cachingPolicy="none"
 v1oex2celadm02: GridDisk RECOC1_CD_00_v1oex2celadm02 successfully altered
 v1oex2celadm02: GridDisk RECOC1_CD_01_v1oex2celadm02 successfully altered
 v1oex2celadm02: GridDisk RECOC1_CD_02_v1oex2celadm02 successfully altered
 v1oex2celadm02: GridDisk RECOC1_CD_03_v1oex2celadm02 successfully altered
 v1oex2celadm02: GridDisk RECOC1_CD_04_v1oex2celadm02 successfully altered
 v1oex2celadm02: GridDisk RECOC1_CD_05_v1oex2celadm02 successfully altered
[root@v1oex2dbadm01 ~]# dcli -c v1oex2celadm03 -l root cellcli -e alter griddisk RECOC1_CD_00_v1oex2celadm03,RECOC1_CD_01_v1oex2celadm03,RECOC1_CD_02_v1oex2celadm03,RECOC1_CD_03_v1oex2celadm03,RECOC1_CD_04_v1oex2celadm03,RECOC1_CD_05_v1oex2celadm03 cachingPolicy="none"
 v1oex2celadm03: GridDisk RECOC1_CD_00_v1oex2celadm03 successfully altered
 v1oex2celadm03: GridDisk RECOC1_CD_01_v1oex2celadm03 successfully altered
 v1oex2celadm03: GridDisk RECOC1_CD_02_v1oex2celadm03 successfully altered
 v1oex2celadm03: GridDisk RECOC1_CD_03_v1oex2celadm03 successfully altered
 v1oex2celadm03: GridDisk RECOC1_CD_04_v1oex2celadm03 successfully altered
 v1oex2celadm03: GridDisk RECOC1_CD_05_v1oex2celadm03 successfully altered
[root@v1oex2dbadm01 ~]#
Now when we enabling of Write-Back Flash Cache, it will not cache for grid disks for RECO and DBFS disk group, avoiding the need to flush to disk and change policy as post step:
[root@v1oex2dbadm01 ~]# dcli -g /opt/oracle.SupportTools/onecommand/cell_group -l root cellcli -e list griddisk attributes name,cachingpolicy,cachedby
 v1oex2celadm01: DATAC1_CD_00_v1oex2celadm01 default
 v1oex2celadm01: DATAC1_CD_01_v1oex2celadm01 default
 v1oex2celadm01: DATAC1_CD_02_v1oex2celadm01 default
 v1oex2celadm01: DATAC1_CD_03_v1oex2celadm01 default
 v1oex2celadm01: DATAC1_CD_04_v1oex2celadm01 default
 v1oex2celadm01: DATAC1_CD_05_v1oex2celadm01 default
 v1oex2celadm01: DBFS_DG_CD_02_v1oex2celadm01 none
 v1oex2celadm01: DBFS_DG_CD_03_v1oex2celadm01 none
 v1oex2celadm01: DBFS_DG_CD_04_v1oex2celadm01 none
 v1oex2celadm01: DBFS_DG_CD_05_v1oex2celadm01 none
 v1oex2celadm01: RECOC1_CD_00_v1oex2celadm01 none
 v1oex2celadm01: RECOC1_CD_01_v1oex2celadm01 none
 v1oex2celadm01: RECOC1_CD_02_v1oex2celadm01 none
 v1oex2celadm01: RECOC1_CD_03_v1oex2celadm01 none
 v1oex2celadm01: RECOC1_CD_04_v1oex2celadm01 none
 v1oex2celadm01: RECOC1_CD_05_v1oex2celadm01 none
 v1oex2celadm02: DATAC1_CD_00_v1oex2celadm02 default
 v1oex2celadm02: DATAC1_CD_01_v1oex2celadm02 default
 v1oex2celadm02: DATAC1_CD_02_v1oex2celadm02 default
 v1oex2celadm02: DATAC1_CD_03_v1oex2celadm02 default
 v1oex2celadm02: DATAC1_CD_04_v1oex2celadm02 default
 v1oex2celadm02: DATAC1_CD_05_v1oex2celadm02 default
 v1oex2celadm02: DBFS_DG_CD_02_v1oex2celadm02 none
 v1oex2celadm02: DBFS_DG_CD_03_v1oex2celadm02 none
 v1oex2celadm02: DBFS_DG_CD_04_v1oex2celadm02 none
 v1oex2celadm02: DBFS_DG_CD_05_v1oex2celadm02 none
 v1oex2celadm02: RECOC1_CD_00_v1oex2celadm02 none
 v1oex2celadm02: RECOC1_CD_01_v1oex2celadm02 none
 v1oex2celadm02: RECOC1_CD_02_v1oex2celadm02 none
 v1oex2celadm02: RECOC1_CD_03_v1oex2celadm02 none
 v1oex2celadm02: RECOC1_CD_04_v1oex2celadm02 none
 v1oex2celadm02: RECOC1_CD_05_v1oex2celadm02 none
 v1oex2celadm03: DATAC1_CD_00_v1oex2celadm03 default
 v1oex2celadm03: DATAC1_CD_01_v1oex2celadm03 default
 v1oex2celadm03: DATAC1_CD_02_v1oex2celadm03 default
 v1oex2celadm03: DATAC1_CD_03_v1oex2celadm03 default
 v1oex2celadm03: DATAC1_CD_04_v1oex2celadm03 default
 v1oex2celadm03: DATAC1_CD_05_v1oex2celadm03 default
 v1oex2celadm03: DBFS_DG_CD_02_v1oex2celadm03 none
 v1oex2celadm03: DBFS_DG_CD_03_v1oex2celadm03 none
 v1oex2celadm03: DBFS_DG_CD_04_v1oex2celadm03 none
 v1oex2celadm03: DBFS_DG_CD_05_v1oex2celadm03 none
 v1oex2celadm03: RECOC1_CD_00_v1oex2celadm03 none
 v1oex2celadm03: RECOC1_CD_01_v1oex2celadm03 none
 v1oex2celadm03: RECOC1_CD_02_v1oex2celadm03 none
 v1oex2celadm03: RECOC1_CD_03_v1oex2celadm03 none
 v1oex2celadm03: RECOC1_CD_04_v1oex2celadm03 none
 v1oex2celadm03: RECOC1_CD_05_v1oex2celadm03 none
 [root@v1oex2dbadm01 ~]#
Next we check that all the grid disks on all storage cells have the asmdeactivationoutcome and asmmodestatus as “Yes” and “ONLINE” respectively.
[root@v1ex2dbadm01 ~]# dcli -g /opt/oracle.SupportTools/onecommand/cell_group -l root cellcli -e list griddisk attributes asmdeactivationoutcome, asmmodestatus
v1ex2celadm01: Yes ONLINE
v1ex2celadm01: Yes ONLINE
v1ex2celadm01: Yes ONLINE
v1ex2celadm01: Yes ONLINE
v1ex2celadm01: Yes ONLINE
v1ex2celadm01: Yes ONLINE
v1ex2celadm01: Yes ONLINE
v1ex2celadm01: Yes ONLINE
v1ex2celadm01: Yes ONLINE
v1ex2celadm01: Yes ONLINE
v1ex2celadm01: Yes ONLINE
v1ex2celadm01: Yes ONLINE
v1ex2celadm01: Yes ONLINE
v1ex2celadm01: Yes ONLINE
v1ex2celadm01: Yes ONLINE
v1ex2celadm01: Yes ONLINE
v1ex2celadm02: Yes ONLINE
v1ex2celadm02: Yes ONLINE
v1ex2celadm02: Yes ONLINE
v1ex2celadm02: Yes ONLINE
v1ex2celadm02: Yes ONLINE
v1ex2celadm02: Yes ONLINE
v1ex2celadm02: Yes ONLINE
v1ex2celadm02: Yes ONLINE
v1ex2celadm02: Yes ONLINE
v1ex2celadm02: Yes ONLINE
v1ex2celadm02: Yes ONLINE
v1ex2celadm02: Yes ONLINE
v1ex2celadm02: Yes ONLINE
v1ex2celadm02: Yes ONLINE
v1ex2celadm02: Yes ONLINE
v1ex2celadm02: Yes ONLINE
v1ex2celadm03: Yes ONLINE
v1ex2celadm03: Yes ONLINE
v1ex2celadm03: Yes ONLINE
v1ex2celadm03: Yes ONLINE
v1ex2celadm03: Yes ONLINE
v1ex2celadm03: Yes ONLINE
v1ex2celadm03: Yes ONLINE
v1ex2celadm03: Yes ONLINE
v1ex2celadm03: Yes ONLINE
v1ex2celadm03: Yes ONLINE
v1ex2celadm03: Yes ONLINE
v1ex2celadm03: Yes ONLINE
v1ex2celadm03: Yes ONLINE
v1ex2celadm03: Yes ONLINE
v1ex2celadm03: Yes ONLINE
v1ex2celadm03: Yes ONLINE
[root@v1ex2dbadm01 ~]#
Next we check that all of the Flash Cache are in the “normal” state and that no flash disks are in a degraded or critical state:
[root@v1ex2dbadm01 ~]# dcli -g /opt/oracle.SupportTools/onecommand/cell_group -l root cellcli -e list flashcache detail
v1ex2celadm01: name: v1ex2celadm01_FLASHCACHE
v1ex2celadm01: cellDisk: FD_01_v1ex2celadm01,FD_00_v1ex2celadm01
v1ex2celadm01: creationTime: 2015-07-01T13:39:22+01:00
v1ex2celadm01: degradedCelldisks:
v1ex2celadm01: effectiveCacheSize: 2.910369873046875T
v1ex2celadm01: id: 655bdb7a-8d3b-40e5-88af-cd42843dd3f7
v1ex2celadm01: size: 2.910369873046875T
v1ex2celadm01: status: normal
v1ex2celadm02: name: v1ex2celadm02_FLASHCACHE
v1ex2celadm02: cellDisk: FD_01_v1ex2celadm02,FD_00_v1ex2celadm02
v1ex2celadm02: creationTime: 2015-07-01T06:38:05+01:00
v1ex2celadm02: degradedCelldisks:
v1ex2celadm02: effectiveCacheSize: 2.910369873046875T
v1ex2celadm02: id: 1cc0f7a4-885a-4e23-aec5-b47bc488e8e3
v1ex2celadm02: size: 2.910369873046875T
v1ex2celadm02: status: normal
v1ex2celadm03: name: v1ex2celadm03_FLASHCACHE
v1ex2celadm03: cellDisk: FD_01_v1ex2celadm03,FD_00_v1ex2celadm03
v1ex2celadm03: creationTime: 2015-07-01T20:39:30+01:00
v1ex2celadm03: degradedCelldisks:
v1ex2celadm03: effectiveCacheSize: 2.910369873046875T
v1ex2celadm03: id: b07f6011-1d66-4c3f-a25f-26d1e6b55633
v1ex2celadm03: size: 2.910369873046875T
v1ex2celadm03: status: normal
[root@v1ex2dbadm01 ~]#
Next we validate all the Physical Disks are in the “NORMAL” state before we modify the Flash Cache:
[root@v1ex2dbadm01 ~]# dcli -l root -g /opt/oracle.SupportTools/onecommand/cell_group cellcli -e "list physicaldisk attributes name,status"
v1ex2celadm01: 8:0 normal
v1ex2celadm01: 8:1 normal
v1ex2celadm01: 8:2 normal
v1ex2celadm01: 8:3 normal
v1ex2celadm01: 8:4 normal
v1ex2celadm01: 8:5 normal
v1ex2celadm01: 8:6 normal
v1ex2celadm01: 8:7 normal
v1ex2celadm01: 8:8 normal
v1ex2celadm01: 8:9 normal
v1ex2celadm01: 8:10 normal
v1ex2celadm01: 8:11 normal
v1ex2celadm01: FLASH_1_1 normal
v1ex2celadm01: FLASH_2_1 normal
v1ex2celadm01: FLASH_4_1 normal
v1ex2celadm01: FLASH_5_1 normal
v1ex2celadm02: 8:0 normal
v1ex2celadm02: 8:1 normal
v1ex2celadm02: 8:2 normal
v1ex2celadm02: 8:3 normal
v1ex2celadm02: 8:4 normal
v1ex2celadm02: 8:5 normal
v1ex2celadm02: 8:6 normal
v1ex2celadm02: 8:7 normal
v1ex2celadm02: 8:8 normal
v1ex2celadm02: 8:9 normal
v1ex2celadm02: 8:10 normal
v1ex2celadm02: 8:11 normal
v1ex2celadm02: FLASH_1_1 normal
v1ex2celadm02: FLASH_2_1 normal
v1ex2celadm02: FLASH_4_1 normal
v1ex2celadm02: FLASH_5_1 normal
v1ex2celadm03: 8:0 normal
v1ex2celadm03: 8:1 normal
v1ex2celadm03: 8:2 normal
v1ex2celadm03: 8:3 normal
v1ex2celadm03: 8:4 normal
v1ex2celadm03: 8:5 normal
v1ex2celadm03: 8:6 normal
v1ex2celadm03: 8:7 normal
v1ex2celadm03: 8:8 normal
v1ex2celadm03: 8:9 normal
v1ex2celadm03: 8:10 normal
v1ex2celadm03: 8:11 normal
v1ex2celadm03: FLASH_1_1 normal
v1ex2celadm03: FLASH_2_1 normal
v1ex2celadm03: FLASH_4_1 normal
v1ex2celadm03: FLASH_5_1 normal
[root@v1ex2dbadm01 ~]#
You can run the same command with inverse grep on “normal” to ensure you didn’t miss any disks that are not normal:
[root@v1ex2dbadm01 ~]# dcli -l root -g /opt/oracle.SupportTools/onecommand/cell_group cellcli -e "list physicaldisk attributes name,status"|grep -v normal
[root@v1ex2dbadm01 ~]#
Next we drop the Flash Cache to be able to change the attribute:
PLEASE NOTE: Any data that is currently cached in Flash Cache and being served will then need to be served by Hard Disks and a noticeable performance degradation will be observed. Hence it is recommend to enabled Write-Back Flash Cache during a period of reduced workload to reduce the performance impact on the database.
[root@v1ex2dbadm01 ~]# dcli -l root -g /opt/oracle.SupportTools/onecommand/cell_group cellcli -e drop flashcache
v1ex2celadm01: Flash cache v1ex2celadm01_FLASHCACHE successfully dropped
v1ex2celadm02: Flash cache v1ex2celadm02_FLASHCACHE successfully dropped
v1ex2celadm03: Flash cache v1ex2celadm03_FLASHCACHE successfully dropped
[root@v1ex2dbadm01 ~]#
Next we set the “flashCacheMode” attribute to “writeback“:
[root@v1ex2dbadm01 ~]# dcli -l root -g /opt/oracle.SupportTools/onecommand/cell_group cellcli -e "alter cell flashCacheMode=writeback"
v1ex2celadm01: Cell v1ex2celadm01 successfully altered
v1ex2celadm02: Cell v1ex2celadm02 successfully altered
v1ex2celadm03: Cell v1ex2celadm03 successfully altered
[root@v1ex2dbadm01 ~]#
Next we re-create the Flash Cache, which will be in Write-Back instead of WriteThrough:
[root@v1ex2dbadm01 ~]# dcli -l root -g /opt/oracle.SupportTools/onecommand/cell_group cellcli -e create flashcache all
v1ex2celadm01: Flash cache v1ex2celadm01_FLASHCACHE successfully created
v1ex2celadm02: Flash cache v1ex2celadm02_FLASHCACHE successfully created
v1ex2celadm03: Flash cache v1ex2celadm03_FLASHCACHE successfully created
[root@v1ex2dbadm01 ~]#
Next we check the attribute “flashCacheMode” is actually now “writeback“:
[root@v1ex2dbadm01 ~]# dcli -g /opt/oracle.SupportTools/onecommand/cell_group -l root cellcli -e "list cell attributes flashcachemode"
v1ex2celadm01: writeback
v1ex2celadm02: writeback
v1ex2celadm03: writeback
[root@v1ex2dbadm01 ~]#
At this point, write I/O will go straight to flash and then can be moved to hard disk if aged or not required for read caching. The Flash Cache will be repopulated over time and performance will return to normal for reads with addition performance for writes 🙂
You can check the usage increase as Flash Cache repopulates as follows:
[root@v1oex2dbadm01 ~]# dcli -g /opt/oracle.SupportTools/onecommand/cell_group -l root cellcli -e LIST METRICCURRENT FC_BY_USED
 v1oex2celadm01: FC_BY_USED FLASHCACHE 104,838 MB
 v1oex2celadm02: FC_BY_USED FLASHCACHE 104,479 MB
 v1oex2celadm03: FC_BY_USED FLASHCACHE 105,192 MB
[root@v1oex2dbadm01 ~]#
Finally, we validate grid disk attributes cachingPolicy and cachedby, where we can see only the DATA disk group is being cached by Flash Cache and by which Flash Disk:
[root@v1oex2dbadm01 ~]# dcli -g /opt/oracle.SupportTools/onecommand/cell_group -l root cellcli -e list griddisk attributes name,cachingpolicy,cachedby
v1oex2celadm01: DATAC1_CD_00_v1oex2celadm01 default FD_01_v1oex2celadm01
v1oex2celadm01: DATAC1_CD_01_v1oex2celadm01 default FD_01_v1oex2celadm01
v1oex2celadm01: DATAC1_CD_02_v1oex2celadm01 default FD_00_v1oex2celadm01
v1oex2celadm01: DATAC1_CD_03_v1oex2celadm01 default FD_00_v1oex2celadm01
v1oex2celadm01: DATAC1_CD_04_v1oex2celadm01 default FD_01_v1oex2celadm01
v1oex2celadm01: DATAC1_CD_05_v1oex2celadm01 default FD_00_v1oex2celadm01
v1oex2celadm01: DBFS_DG_CD_02_v1oex2celadm01 none
v1oex2celadm01: DBFS_DG_CD_03_v1oex2celadm01 none
v1oex2celadm01: DBFS_DG_CD_04_v1oex2celadm01 none
v1oex2celadm01: DBFS_DG_CD_05_v1oex2celadm01 none
v1oex2celadm01: RECOC1_CD_00_v1oex2celadm01 none
v1oex2celadm01: RECOC1_CD_01_v1oex2celadm01 none
v1oex2celadm01: RECOC1_CD_02_v1oex2celadm01 none
v1oex2celadm01: RECOC1_CD_03_v1oex2celadm01 none
v1oex2celadm01: RECOC1_CD_04_v1oex2celadm01 none
v1oex2celadm01: RECOC1_CD_05_v1oex2celadm01 none
v1oex2celadm02: DATAC1_CD_00_v1oex2celadm02 default FD_01_v1oex2celadm02
v1oex2celadm02: DATAC1_CD_01_v1oex2celadm02 default FD_00_v1oex2celadm02
v1oex2celadm02: DATAC1_CD_02_v1oex2celadm02 default FD_01_v1oex2celadm02
v1oex2celadm02: DATAC1_CD_03_v1oex2celadm02 default FD_01_v1oex2celadm02
v1oex2celadm02: DATAC1_CD_04_v1oex2celadm02 default FD_00_v1oex2celadm02
v1oex2celadm02: DATAC1_CD_05_v1oex2celadm02 default FD_00_v1oex2celadm02
v1oex2celadm02: DBFS_DG_CD_02_v1oex2celadm02 none
v1oex2celadm02: DBFS_DG_CD_03_v1oex2celadm02 none
v1oex2celadm02: DBFS_DG_CD_04_v1oex2celadm02 none
v1oex2celadm02: DBFS_DG_CD_05_v1oex2celadm02 none
v1oex2celadm02: RECOC1_CD_00_v1oex2celadm02 none
v1oex2celadm02: RECOC1_CD_01_v1oex2celadm02 none
v1oex2celadm02: RECOC1_CD_02_v1oex2celadm02 none
v1oex2celadm02: RECOC1_CD_03_v1oex2celadm02 none
v1oex2celadm02: RECOC1_CD_04_v1oex2celadm02 none
v1oex2celadm02: RECOC1_CD_05_v1oex2celadm02 none
v1oex2celadm03: DATAC1_CD_00_v1oex2celadm03 default FD_01_v1oex2celadm03
v1oex2celadm03: DATAC1_CD_01_v1oex2celadm03 default FD_01_v1oex2celadm03
v1oex2celadm03: DATAC1_CD_02_v1oex2celadm03 default FD_00_v1oex2celadm03
v1oex2celadm03: DATAC1_CD_03_v1oex2celadm03 default FD_00_v1oex2celadm03
v1oex2celadm03: DATAC1_CD_04_v1oex2celadm03 default FD_01_v1oex2celadm03
v1oex2celadm03: DATAC1_CD_05_v1oex2celadm03 default FD_00_v1oex2celadm03
v1oex2celadm03: DBFS_DG_CD_02_v1oex2celadm03 none
v1oex2celadm03: DBFS_DG_CD_03_v1oex2celadm03 none
v1oex2celadm03: DBFS_DG_CD_04_v1oex2celadm03 none
v1oex2celadm03: DBFS_DG_CD_05_v1oex2celadm03 none
v1oex2celadm03: RECOC1_CD_00_v1oex2celadm03 none
v1oex2celadm03: RECOC1_CD_01_v1oex2celadm03 none
v1oex2celadm03: RECOC1_CD_02_v1oex2celadm03 none
v1oex2celadm03: RECOC1_CD_03_v1oex2celadm03 none
v1oex2celadm03: RECOC1_CD_04_v1oex2celadm03 none
v1oex2celadm03: RECOC1_CD_05_v1oex2celadm03 none
[root@v1oex2dbadm01 ~]#
Final note, there is a script provided by Oracle that can do this all for you called setWBFC, however the version 1.0.0.2.1.20160602 didn’t work for me as it detected 4 Flash Disks in eighth rack when it expected 2. Although there are only 2 in use in eighth rack, there are 4 physically present, so I believe this is a bug. I did raise an SR with Oracle Support, which is yet to be concluded. Below is the output for those who are interested:
[root@v1oex2dbadm01 WBFC]# ./setWBFC.sh
 setWBFC Version: 1.0.0.2.1.20160602
 Usage:
 ./setWBFC.sh -g cell_group_file [-d dbs_group_file ]
 [ -h ] [ -i ] [ -l log_directory ]
 [ -m WriteBack | WriteThrough ] [ -o rolling | non-rolling ]
 [ -p ] [ -s step_number ] [ -t time_out_seconds ]
 [ -x trace_level ] [ -v ]

-g file file that lists cell host names, one per line
 -d file file that lists the database host names, one
 per line. Required for non-rolling.
 -h help, print this information
 -i run in interactive mode
 -l log directory directory path for log files
 -m FC_mode flashcache mode: WriteBack | WriteThrough
 -o exec_mode execution mode: rolling | non-rolling (default)
 -p perform a precheck only
 -s step # (*) specify step number to restart at
 -t timeout sec specify in seconds the amount of time to wait
 for griddisks to come ONLINE - range: [600 - 43200]
 Default: 21600 (6 hours)
 -x trace level # specify trace level for further diagnostics
 -v show version

(*) -- Option not yet implemented.

 [root@v1oex2dbadm01 WBFC]# ./setWBFC.sh -g /opt/oracle.SupportTools/onecommand/cell_group -l /root/v1/WBFC/logs -m WriteBack -o rolling -p
 ./setWBFC.sh: Using log directory '/root/v1/WBFC/logs'
 ./setWBFC.sh: Log File '/root/v1/WBFC/logs/setWBFC_18335_2018-01-17-10:46:26.log' created successfully
 2018-01-17 10:46:26
 Starting ./setWBFC.sh on v1oex2dbadm01
 Version: 1.0.0.2.1.20160602
 Command line options used:
 -g /opt/oracle.SupportTools/onecommand/cell_group
 -o rolling
 -m WriteBack
 -p (Perform pre-req checks only)
 -t 21600
 -x 0

2018-01-17 10:46:26
 Performing pre-req checks.....
 2018-01-17 10:46:26
 Creating baseline inventory for griddisks
 2018-01-17 10:46:27
 Creating baseline inventory for flashdisks
 2018-01-17 10:46:28
 Creating baseline inventory for flashsize
 2018-01-17 10:46:28
 dcli present and in PATH. [PASSED]
 2018-01-17 10:46:28
 Checking cell nodes are valid storage servers...
 2018-01-17 10:46:29
 All cells are valid Exadata storage cells.
 2018-01-17 10:46:29
 Checking Exadata Storage Software Versions...
 2018-01-17 10:46:33
 Software versions of the following cells:
 v1oex2celadm01: 12.1.2.3.5.170418 [PASSED]
 v1oex2celadm02: 12.1.2.3.5.170418 [PASSED]
 v1oex2celadm03: 12.1.2.3.5.170418 [PASSED]

2018-01-17 10:46:33
 Checking Grid Infrastructure Software Version...
 2018-01-17 10:46:38
 Grid Infrastructure version: 12.1.0.2.00 [PASSED]

2018-01-17 10:46:38
 Checking for active ASM operations....
 2018-01-17 10:46:38
 Check for no active ASM operations: [PASSED]
 2018-01-17 10:46:38
 Checking griddisk status across all cells....
 2018-01-17 10:46:39
 All griddisks across all cells have asmdeactivationoutcome = Yes
 All griddisks across all cells are ONLINE
 Griddisk checks: [PASSED]
 2018-01-17 10:46:39
 Checking flash cache status.....
 2018-01-17 10:46:40
 Flashcache status normal: [PASSED]
 2018-01-17 10:46:40
 Checking that all FlashDisks are present...
 2018-01-17 10:46:42
 Cell v1oex2celadm01 has one or more FlashDisk missing. Expecting 2 but found 4

2018-01-17 10:46:42
 FlashDisk validation: [FAILED]
 2018-01-17 10:46:42
 Checking current flash cache mode.....
 2018-01-17 10:46:43
 Flashcache not already in target mode: [PASSED]
 2018-01-17 10:46:43
 Pre-req checks failed with status 7. Exiting....

[root@v1oex2dbadm01 WBFC]#
If this works for you, great then I would recommend using this method, otherwise it can be used to double check the pre-requisites at least and then you can do manually as I did shown above 🙂
If you found this blog post useful, please like as well as follow me through my various Social Media avenues available on the sidebar and/or subscribe to this oracle blog via WordPress/e-mail.
Thanks
Zed DBA (Zahid Anwar)